
Review Bulk Message Performance and Recipient Status
Review Bulk Message Performance and Recipient Status
What this article covers
Goal performance and progress against the selected metric
Sends, deliveries, opens, clicks, replies, skips, errors, and unsubscribes
Recipient-level review and status explanations
Follow-up actions based on outcomes
Watch the video to learn about Bulk Messages Performance Metrics in detail.
If you’re looking to learn how to create and send a Bulk Message, read this article.
Note: This article covers Cadences 2.0, the newer outreach experience. Read Cadences vs. Cadences 2.0: What’s the Difference? or go to the original Cadences 1.0 help articles.
Steps
1. Open the Bulk Messages table
Go to Cadences 2.0 and click on Bulk Messages to open the table.
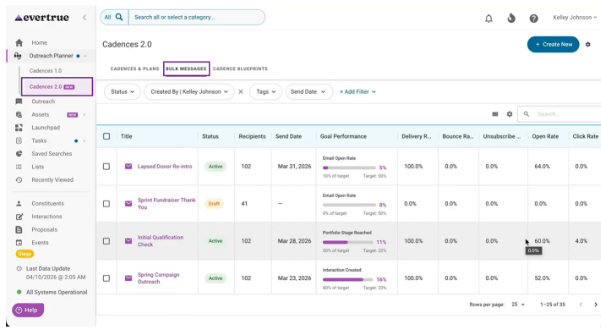
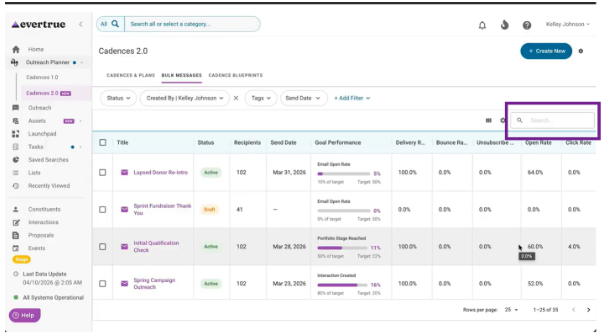
Find the message you want to review by using search, filters, or visible columns to narrow the list if needed.
2. Open the bulk message detail page
Click on the bulk message title to open its detail page. This page is the main place to review performance after sending.
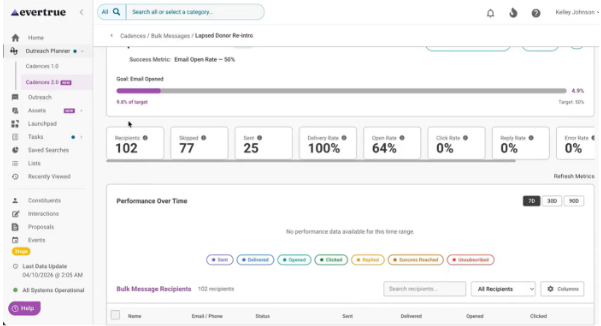
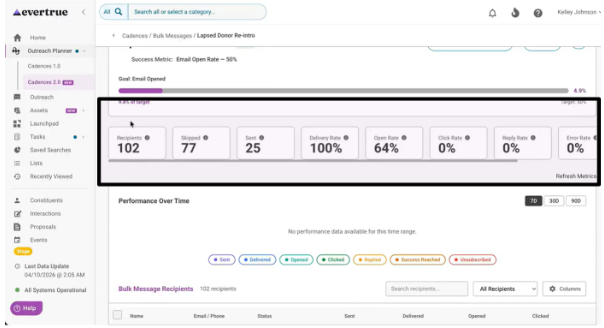
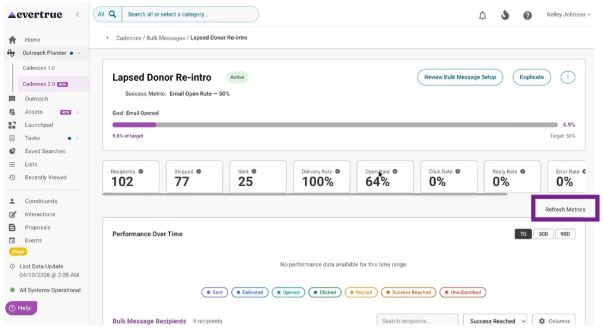
3. Review Goal Performance first
Start with the progress bar or goal area at the top of the page. This shows how the message is tracking against the primary success metric chosen during setup.
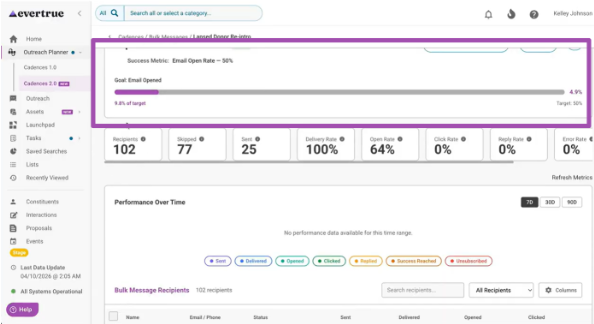
4. Review headline counts
Check the overall counts for intended recipients, skipped recipients, sent messages, deliveries, opens, clicks, replies, errors, and unsubscribes. This gives you a fast read on what happened. Hover your mouse over "i" to see a definition.
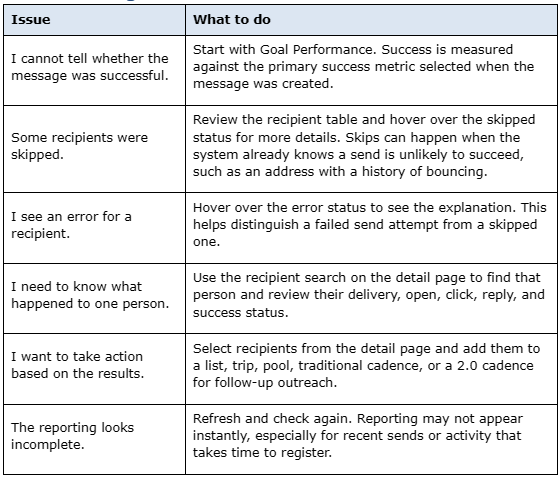
5. Understand skipped recipients and errors
Do not treat skips and errors as the same thing. A skip means the system did not attempt to send to that recipient, while an error means a send attempt happened but failed. Hover over status indicators for more detail. Read this Skip and Error Logic article to learn more.
6. Use the performance-over-time view
Review the time-based graph when you want to see how sends, deliveries, opens, clicks, or related activity accumulate after launch.
7. Review the recipient table
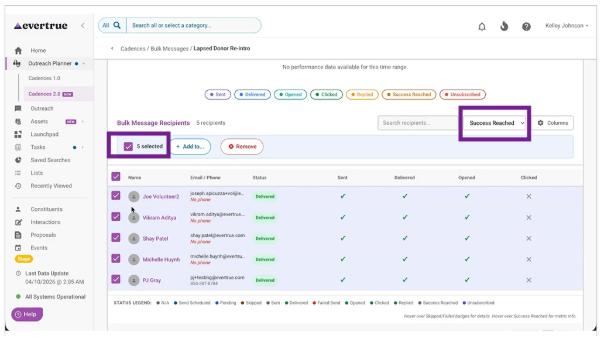
Use the recipient table to see what happened to each person. Search for a specific recipient or filter the table to focus on a group, such as opened, delivered, skipped, or success reached.
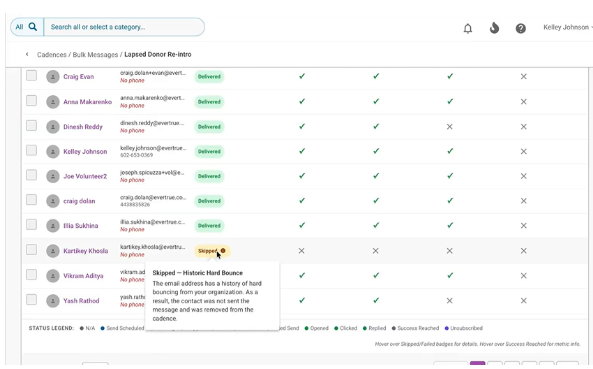
8. Inspect one recipient when needed
When a user asks what happened to one specific person, use the recipient search on the detail page and review that person’s delivery, open, click, reply, and success status.

9. Use outcomes to decide next steps
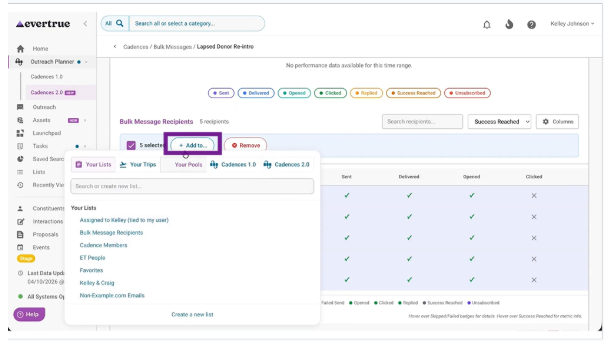
Select recipients from the detail page when you want to take follow-up action, such as adding them to a list, trip, pool, traditional cadence, or a 2.0 cadence.
10. Refresh and review
The data refreshes every hour unless you select Refresh Metrics.
What users should know
The detail page is where message-level and recipient-level reporting come together.
Goal performance is only meaningful in the context of the primary success metric chosen during setup.
Skipped recipients and errors are not interchangeable. Read the status detail before deciding what action to take.
Recipient filters are often the fastest way to identify who needs a follow-up or who has already met the goal.
Best practices
Start with the goal area, then move to the headline counts, then drill into the recipient detail.
Use recipient filters to identify the strongest follow-up candidates instead of scanning every row manually.
Teach users the difference between skipped and failed sends early. That prevents a lot of confusion later.
Refresh and recheck before escalating a reporting issue, especially right after a send.
Troubleshooting
Content aside
- 1 mth agoLast active
- 39Views
-
1
Following