
Create and Publish a Cadence
Create and Publish a Cadence
When to use a cadence
Use a cadence when you need more than one outreach step, such as an email followed by a waiting period, a response check, and a follow-up task or reminder. If you only need to send one message to many people at once, use a bulk message instead. If you are creating a personalized outreach plan for one specific constituent, use a prospect plan instead. Prospect plans use the same core mechanics as cadences but are designed for an audience of one.
Watch this full video on how to create and publish a cadence.
Note: This article covers Cadences 2.0, the newer outreach experience. Read Cadences vs. Cadences 2.0: What’s the Difference? or go to the original Cadences 1.0 help articles.
Steps
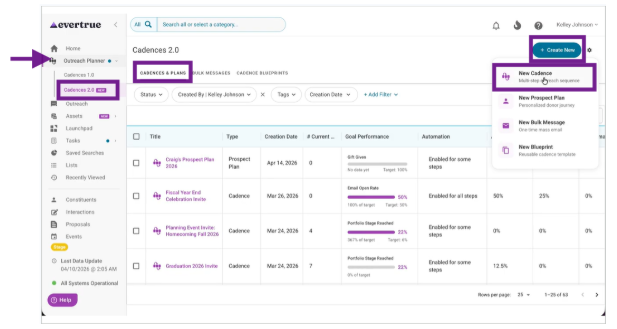
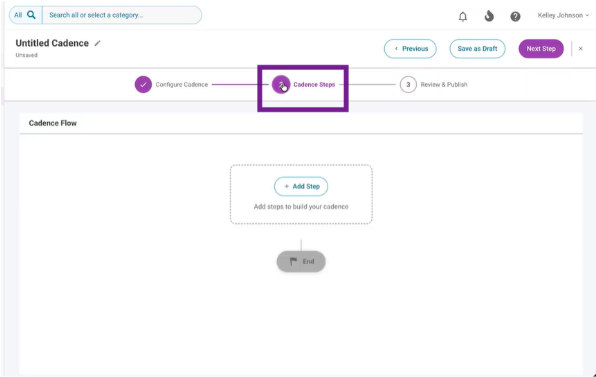
1. Open Cadences 2.0 and start a new cadence
Go to the Cadences 2.0 tab in the left navigation, click Create New (upper right), and select New Cadence to launch the setup flow.
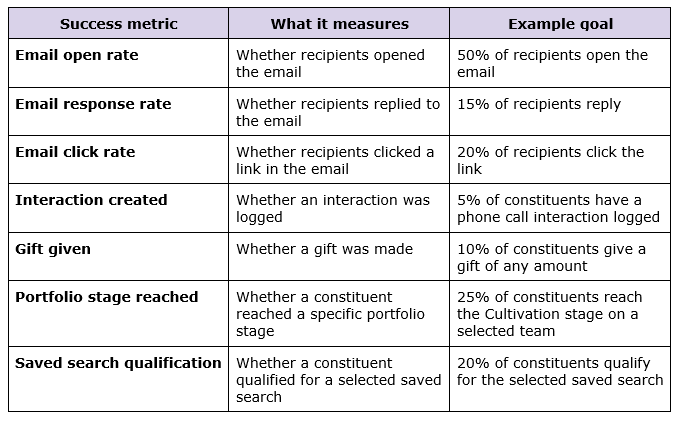
2. Choose the primary success metric
Select one required success metric for the cadence. Choose from one of the following: email open rate, email response rate, email click rate, interaction created, gift given, portfolio stage reached, and saved search qualification.

This table explains the metrics and what the metrics measure.
Note: Success metrics continue tracking for up to 30 days after the cadence ends, which allows time for recipients to respond, take action, or make a gift after the final step.
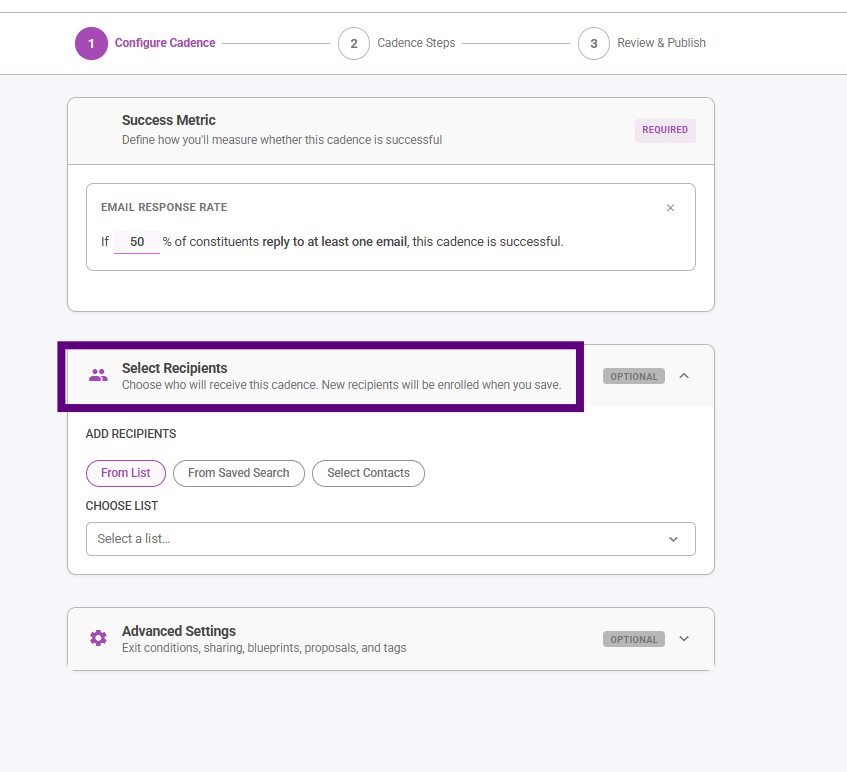
3. Select recipients (or leave the cadence empty for now)
Choose recipients from a list, a saved search, or individual contacts. You can also leave the cadence empty at first and add recipients later.
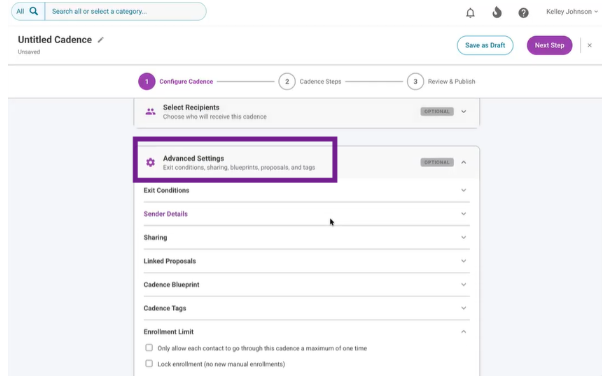
4. Review advanced settings
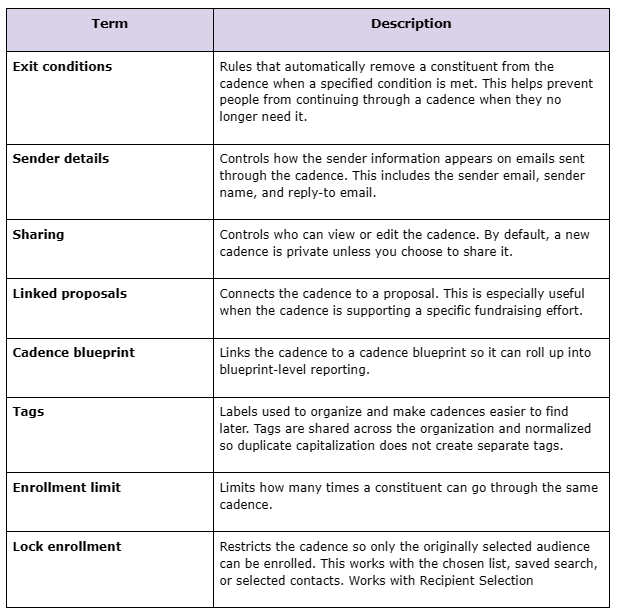
Advanced settings are optional settings. You can choose from the following settings: sender details, sharing, linked proposals, cadence blueprint, tags, and enrollment limit. These settings are optional, but they can make the cadence easier to manage and reuse.
Here’s a table that explains different Advanced Settings.
5. Review enrollment settings
Decide whether to lock enrollment so only the selected list, saved search, or contacts can ever be enrolled. Also, decide whether people should be able to go through the cadence one time or more than once. The enrollment lock activates once the cadence is published and active.

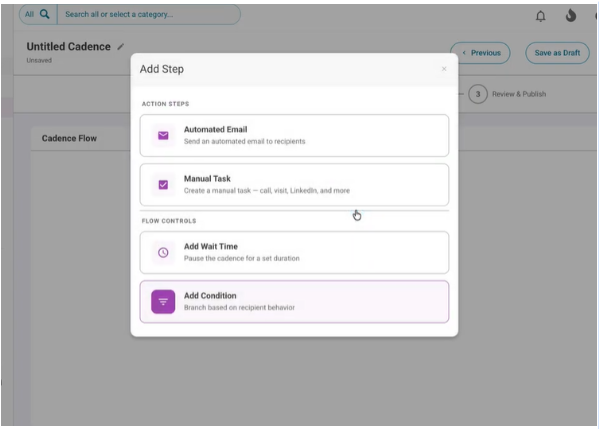
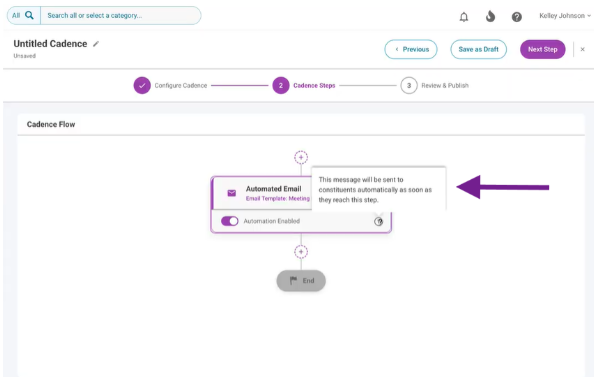
6. Add the first automated email step
Add an automated email as the first cadence step when you want the system to send an email automatically as soon as someone enters the cadence.
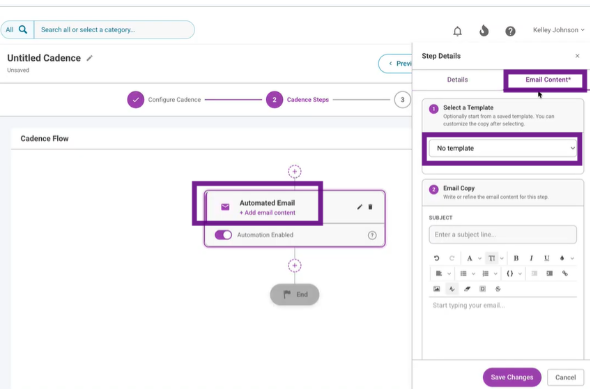
7. Insert an email template and signature
Use the Email Content area to insert a saved email template, edit it if needed, and add a signature. Review the preview to confirm the final message before saving the step. Check out this article about storing your Email and Signatures.
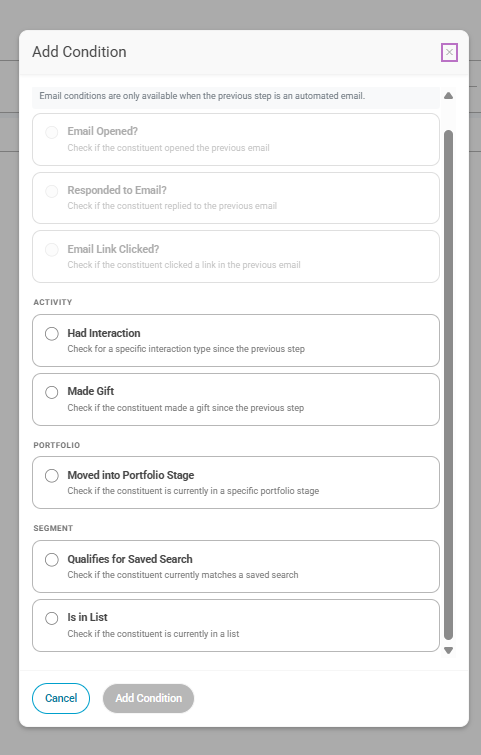
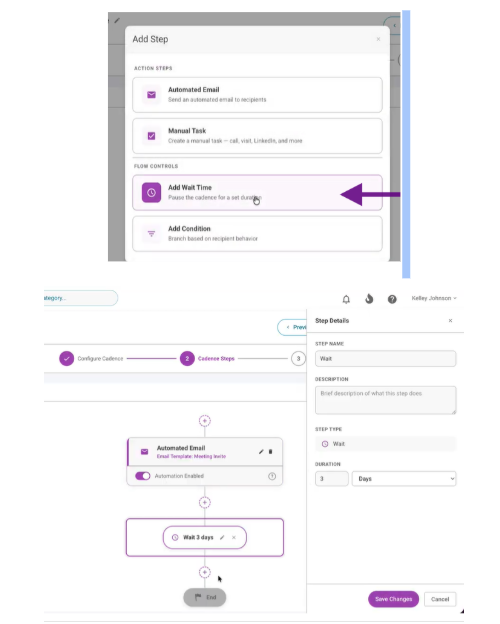
8. Add a waiting period and condition
Add a wait step, then add a condition such as Responded to Email so the cadence can branch based on what happens after the first message is sent. The wait “clock” starts after the previous step is completed (not when it was due). So if a manual task is due today but takes 7 days to complete, the wait time begins on day 7, after the manual task is completed.
9. Add follow-up steps for each path
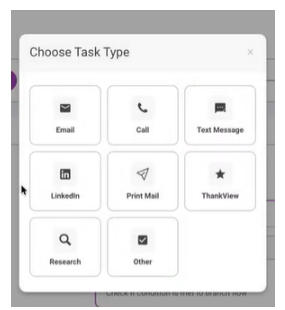
Create the next steps for each branch. For example, one path creates a manual task to reply to the person who responded, and the other path sends an automated reminder email to someone who did not respond. There are eight manual task types: email, call, text message, LinkedIn, Print mail, ThankView, Research, and Other.

Note: When the cadence goes to a manual step, it will not continue until the manual step is completed.
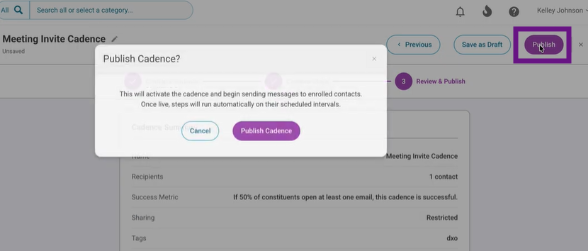
10. Name the cadence and review the flow
Give the cadence a clear name and review the full sequence to confirm that the steps, timing, and branching logic all make sense before publishing.
11. Publish the cadence
Publish the cadence to make it live. Once published, you can begin adding people to it if enrollment is not locked down.
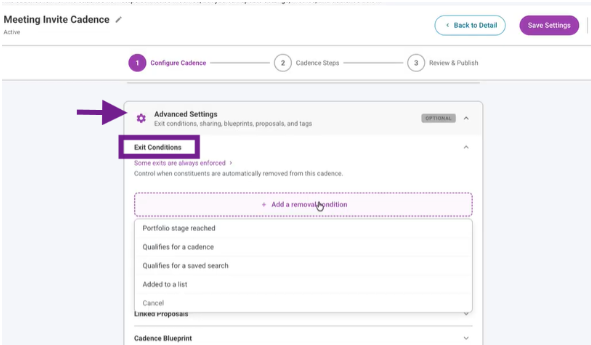
12. Add exit conditions if needed
Use exit conditions when you want people removed automatically after another event happens, such as being added to a list, qualifying for a saved search, qualifying for another cadence, or reaching a portfolio stage.
Constituents are automatically removed from a cadence if:
• The constituent has unsubscribed from outreach
• Outreach bounces, and no alternative contact info is available
• The constituent is missing required info for the next step (e.g., no email)
• The constituent is missing a value in a merge field in one of the cadence messages
What users should know
A cadence is a sequence, not a one-time send.
One primary success metric is required when the cadence is created.
Saved search recipients can continue to pull in new people automatically as they qualify.
Advanced settings are optional, but they can affect who gets enrolled, who can view the cadence, and how the cadence behaves over time.
Templates save time, but the final email content still needs to be reviewed by a human before publishing.
Exit conditions can reduce manual cleanup by automatically removing people when they qualify for another state or workflow.
Best practices
Choose the success metric based on the actual goal of the outreach, not just the easiest number to track.
Use automation where it saves time, but keep personal one-to-one steps manual when that will produce better outreach.
Name cadences clearly so you can find and reuse them later.
Review enrollment settings carefully before publishing, especially if you are using saved searches or locked enrollment.
Use exit conditions to prevent people from receiving unnecessary follow-up after the desired outcome has already happened.
|

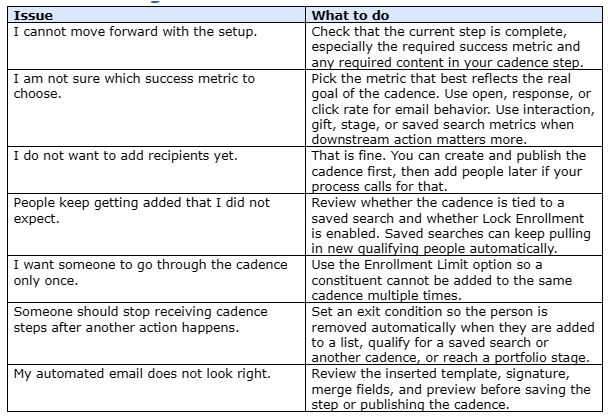
Troubleshooting
Content aside
- 1 mth agoLast active
- 91Views
-
1
Following