
Create a Cadence Blueprint
Create a Cadence Blueprint
When to use a cadence blueprint
Create a cadence blueprint when your team has a repeatable outreach strategy that should be reused across multiple live cadences. Blueprints are especially useful when you want to standardize best practices, save setup time, and make it easier for users to start with a proven structure.
Note: This article covers Cadences 2.0, the newer outreach experience. Read Cadences vs. Cadences 2.0: What’s the Difference? or go to the original Cadences 1.0 help articles.
Steps
1. Open Cadence Blueprints and start a new blueprint
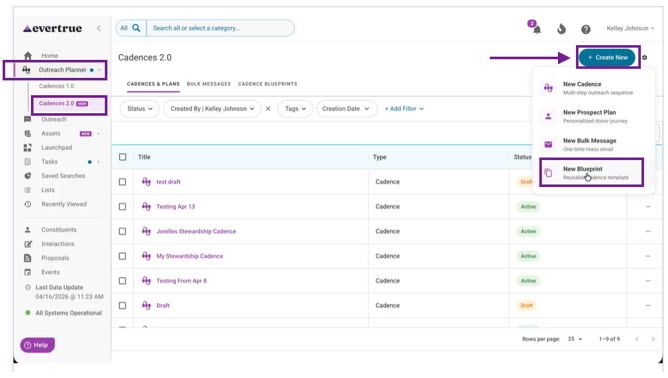
Go to the Cadences 2.0 area, open the Cadence Blueprints tab, click Create New, and select New Blueprint to launch the setup flow.
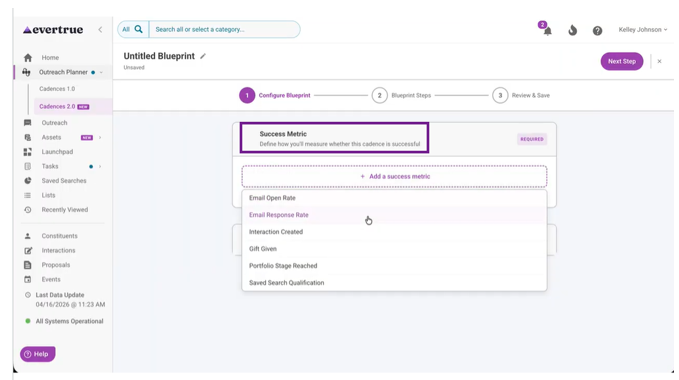
2. Choose the primary success metric
Select the success metric that best matches the goal of the blueprint. For example, if the blueprint is meant to re-engage lapsed donors, the transcript example uses Gift Given as the primary success metric.
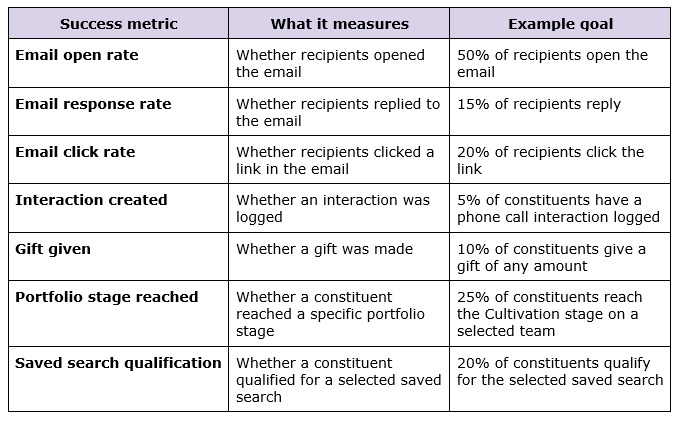
This table explains the metrics and what the metrics measure.
Note: All cadence blueprints should reflect your organization's flow based on the goal. This sequence of steps is for learning purposes to show you what is available.
3. Add the first blueprint step
Begin building the blueprint by adding the first step in the flow. For example, the first step could be an automated email used to reintroduce the organization to lapsed donors.
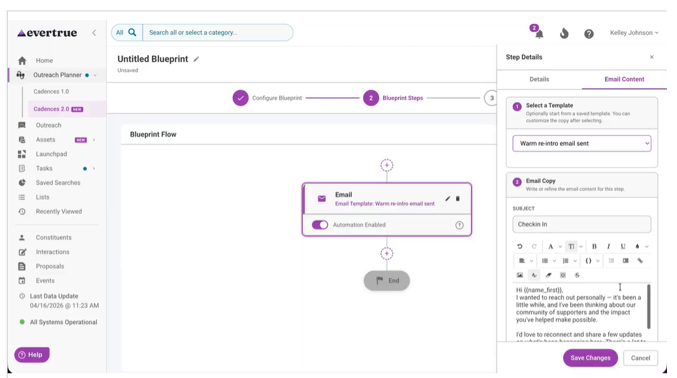
4. Add email content for automated steps
If you add an automated email step, include the email content that users should inherit when they create a cadence from the blueprint. This gives the team a stronger starting point and reduces repetitive setup work.
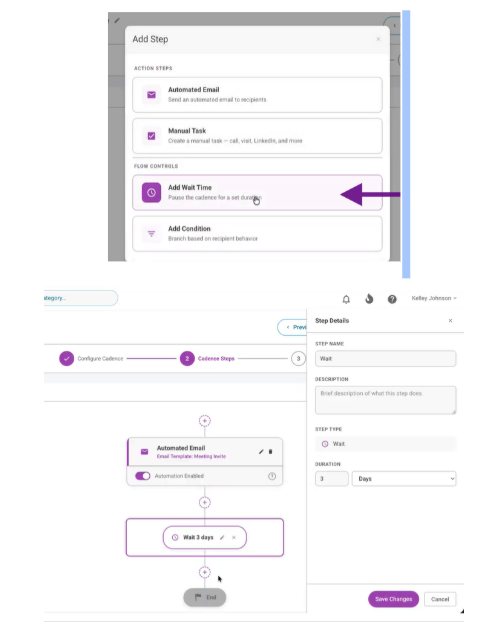
5. Add a wait step
Insert a wait period after the first message if the strategy depends on timing.
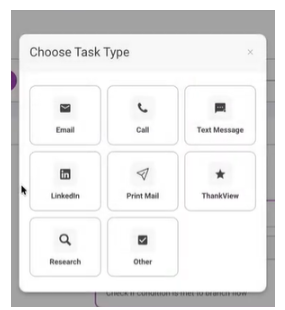
6. Add a manual follow-up step
Use a manual email or task when the next touchpoint should be more personal.
7. Add another automated follow-up
Continue building the outreach flow with another automated email when the strategy calls for one. For example, use a follow-up email focused on donor impact.
8. Add conditional logic
Add a condition when the next step should depend on the recipient's behavior. For example, the blueprint checks whether the recipient has been opening emails and branches the flow based on that result.
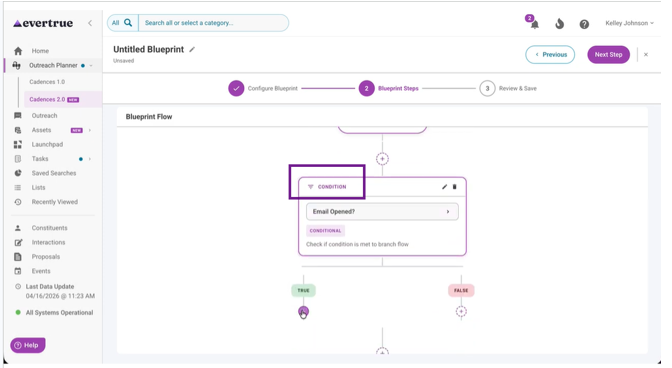
Branching: A cadence feature that lets a workflow split based on a condition, such as whether a contact opened the previous email. Users can add multiple conditions to the cadence, but all resulting branches must split directly from the main workflow path; branching off existing branches is not supported.
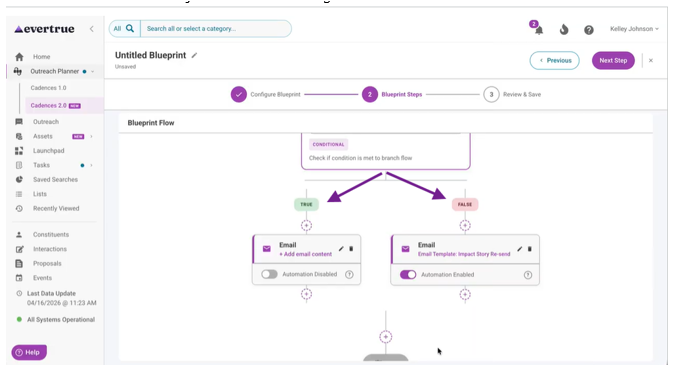
9. Build follow-up steps for each path
Create the next steps for both sides of the condition. For example, one path uses a more personal manual ask for engaged recipients, while the other path sends another automated email with a different subject line and message.
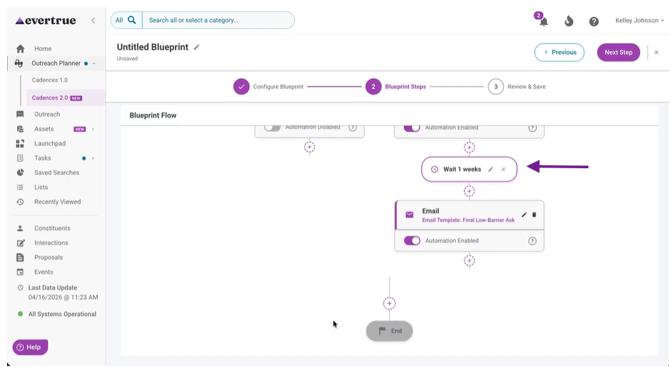
10. Add the final outreach step
Finish the sequence with a final outreach step that matches the goal of the strategy. For example, the last step is a final low-barrier ask after another wait period.
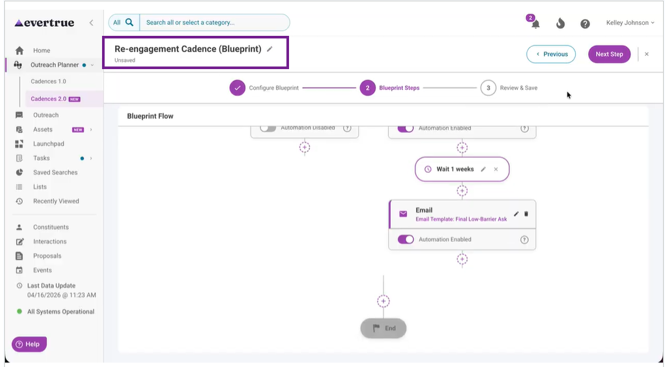
11. Name and save the blueprint
Give the blueprint a clear name that describes its purpose, then save it so it can be reused later.
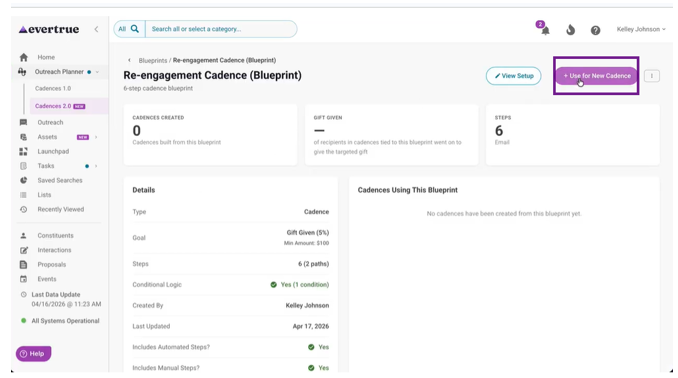
12. Share and reuse the blueprint
Once the blueprint is shared with the right users, they can open it from the Cadence Blueprints area, review it, and select Use for New Cadence. This carries over much of the setup, including the goal, steps, timing, and much of the email content.
What users should know
A cadence blueprint is a reusable template, not a live cadence.
The blueprint can include the goal, step order, wait times, email content, and conditional logic.
Other users can create a live cadence from a shared blueprint by selecting Use for New Cadence.
Starting from a blueprint saves time and helps teams reuse consistent outreach practices.
Best practices
Use a clear name so the blueprint is easy to recognize later.
Build blueprints around repeatable strategies rather than one-time outreach.
Use automated steps where they save time, but keep highly personal tasks manual when that will improve outreach quality.
Share strong blueprint examples with the team so others can reuse proven workflows.
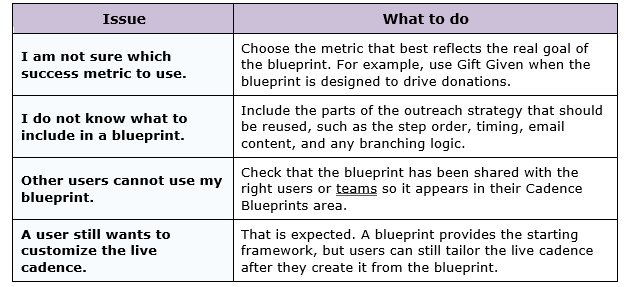
Troubleshooting
Content aside
- 1 mth agoLast active
- 47Views
-
1
Following