
Removing Incorrect Enriched Data
EverTrue enriched data provides valuable insights to your constituent records, supporting your engagement efforts. However, incorrect or outdated information may occasionally appear. We understand how important it is to maintain accurate profiles, so we’ve ensured you can reject specific pieces of data, such as profile images or employment details.
Below, we’ll walk you through how to both remove and reinstate constituent profile enrichment data. Let’s get started!
Note: All data rejections are global, meaning that any removed information will be hidden from constituent profiles for all EverTrue users within your organization.
Rejecting Incorrect Profile Images
Step 1. Click the Gray X Beneath a Profile Image
If a constituent’s profile image is incorrect, hover over the image and click the gray X in the bottom-right. You can do this from any tab of the profile.
Step 2. Choose a Removal Option
A Remove Profile Image pop-up appears, where you can choose from two options:
- Remove Image: Removes only the inaccurate profile image.
- Remove Both: Removes both the profile image and social profile link. Use this option if your institution knows the provided social URL is also incorrect.
https://www.loom.com/share/0145130e44154d5fb6a7a31681e25f26
Note: If you choose Remove Image, you won’t be able to reinstate the rejected profile image. If you select Remove Both, reinstating the corresponding social profile link will also restore the constituent’s profile image.
Step 3. Remove the Profile Image
After choosing a removal option, a summary of the data to be removed from the constituent’s profile appears. Click Remove to finalize rejecting the profile image (and social profile link, if selected).
Note: EverTrue sources profile images from social links associated with the constituent record. After rejecting an image, another (or the same) image may appear from a different social link. Images display in this order: LinkedIn, Twitter, Facebook. If the next image is incorrect, you can continue rejecting it until the correct one (or no image) appears.
Rejecting Incorrect Enrichment Tab Data
When present, you can reject EverTrue enriched data from multiple sections within a constituent profile’s Enrichment tab:
- Career
- Philanthropic Indicators (Leadership and Involvement and Interests)
- Social Media
- Other Details
Below are the steps to reject data for all noted sections within the Enrichment tab!
Step 1. Click the Section’s Pencil Button
Click the Pencil button on the right-hand side of the section.
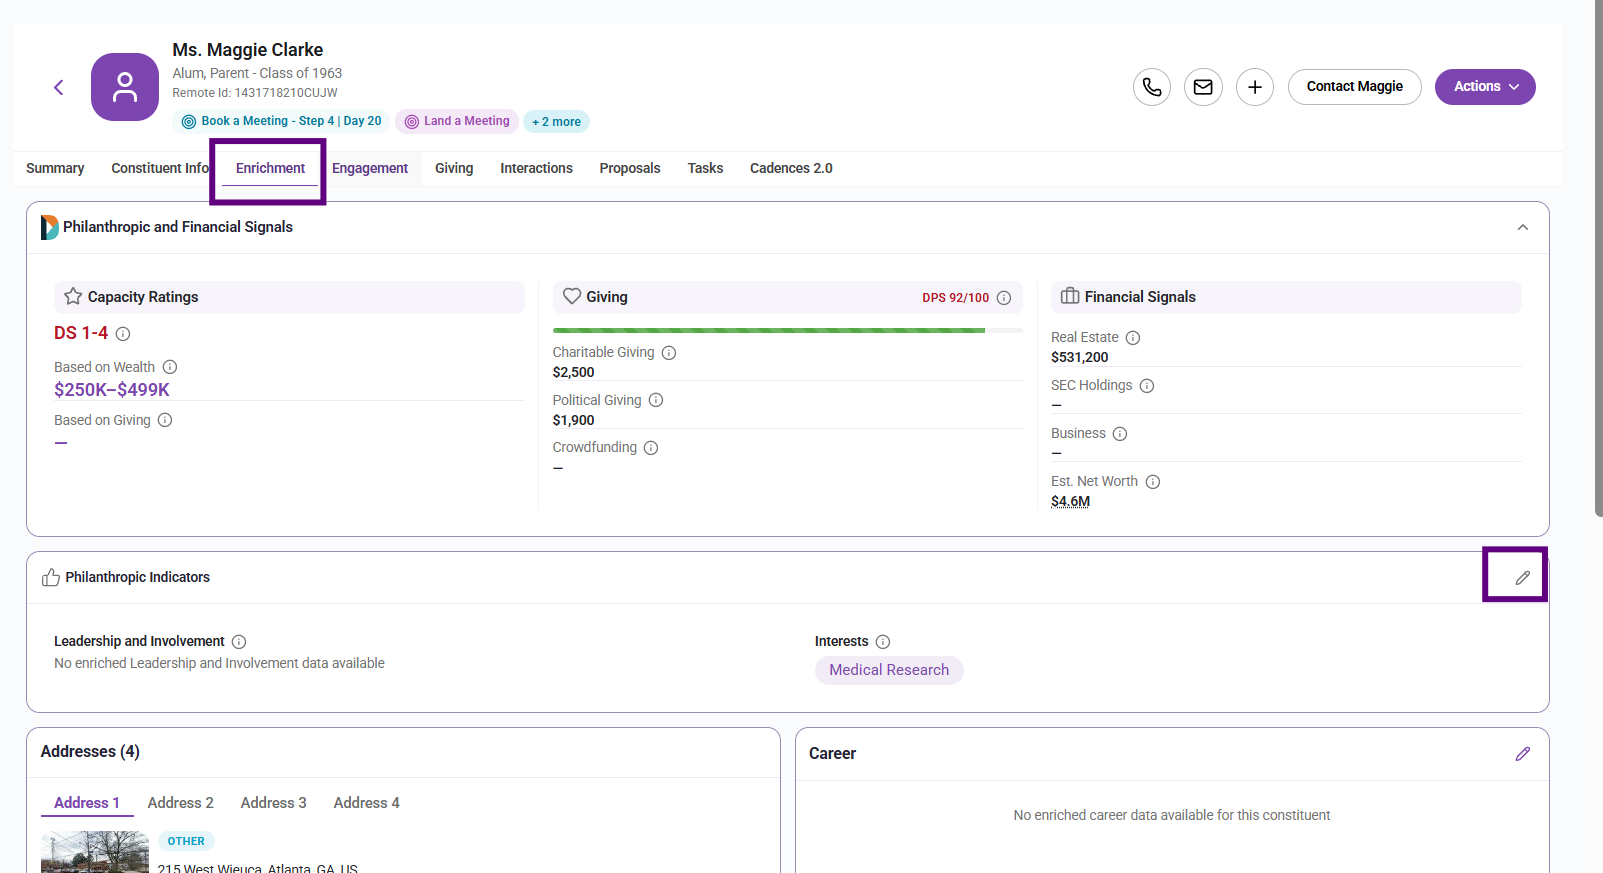
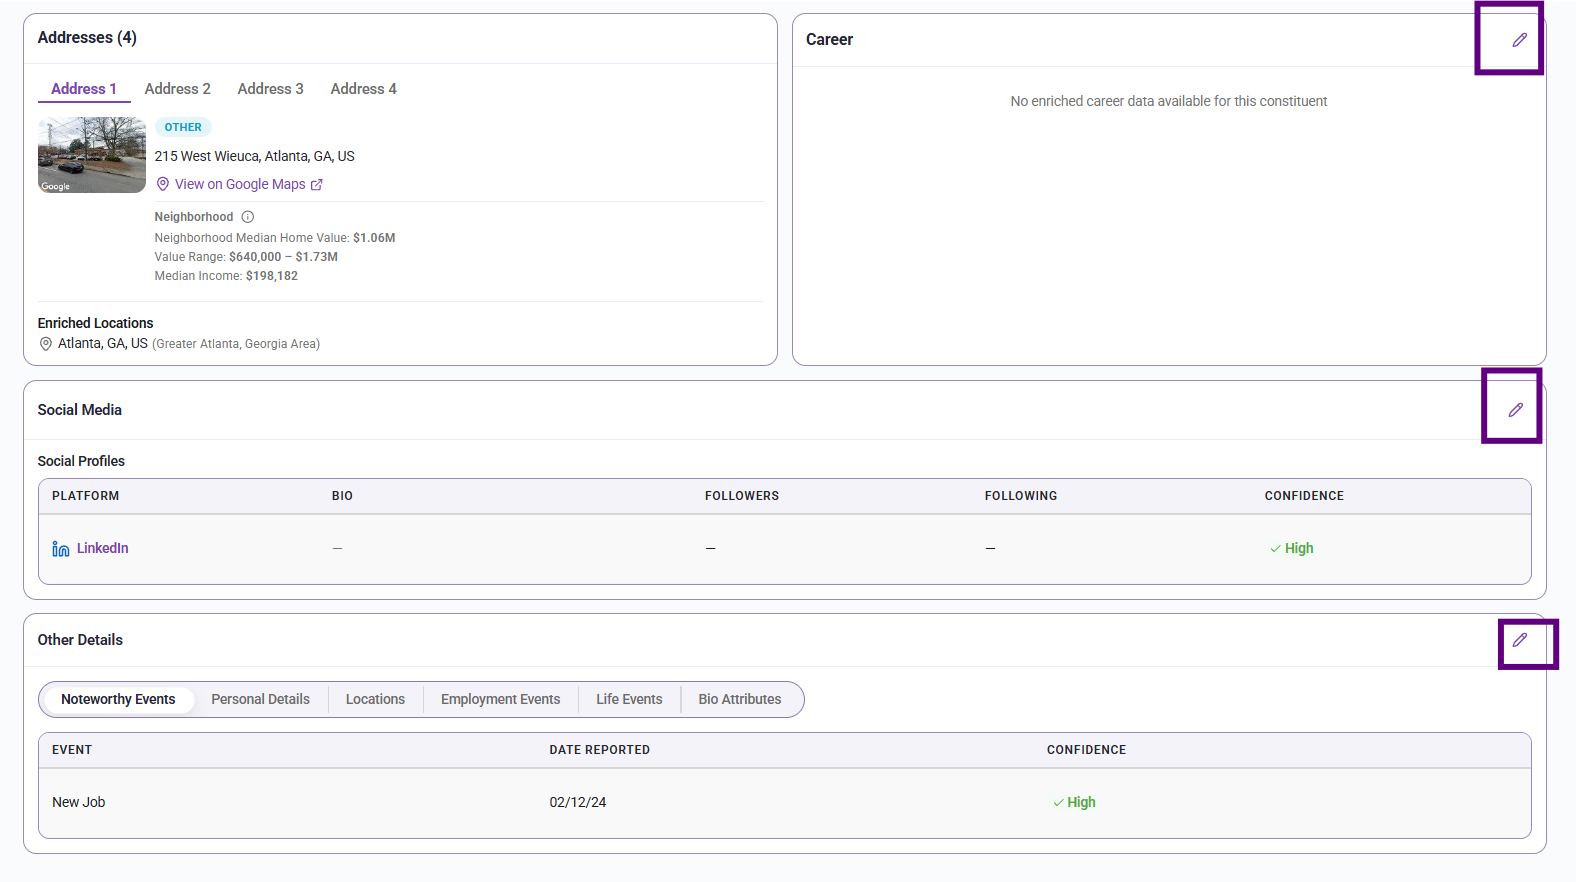
Step 2. Click the Red X Next to Incorrect Data
An Edit [Constituent’s Name] Bio pop-up appears, displaying a comprehensive list of the constituent’s enriched data. Each data point that can be rejected has a red X next to it. Locate the incorrect data you wish to remove, and click the red X to finish rejecting it!
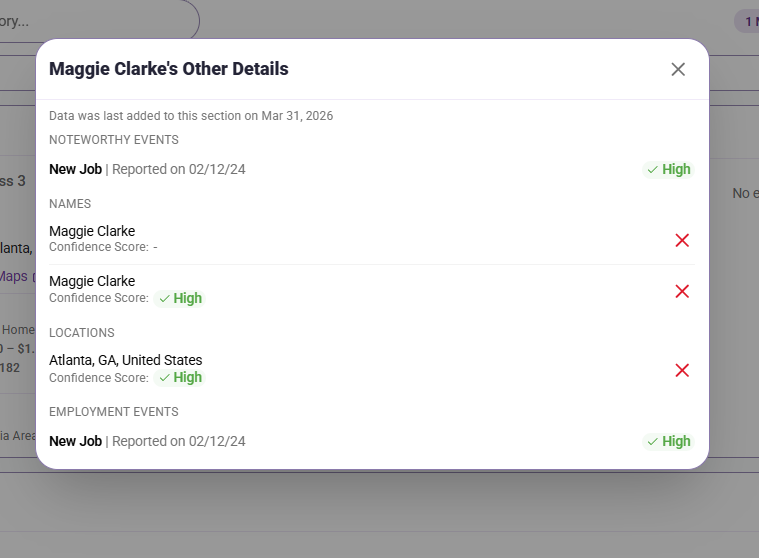
Once you reject the data, EverTrue automatically removes it from the constituent’s section.
Note: If you reject a social media link that is used to source the constituent’s profile image, we also remove the associated image, when applicable. This type of enriched data is in the Social Media section of the Enrichment tab.
Reinstating Enrichment Tab Data
If previously rejected, you can reinstate enriched data from the following sections within a constituent profile’s Enrichment tab:
- Career
- Philanthropic Indicators (Leadership and Involvement and Interests)
- Social Media
- Other Details
Below, we’ll walk through the steps to reinstate rejected data from the Summary section. The steps are the same for all noted sections within the Enrichment tab!
Note: Any EverTrue user within your organization can reinstate this data, even if they did not initially reject it.
Step 1. Click the Section’s Pencil Button
Click the Pencil button on the right-hand side of the section.
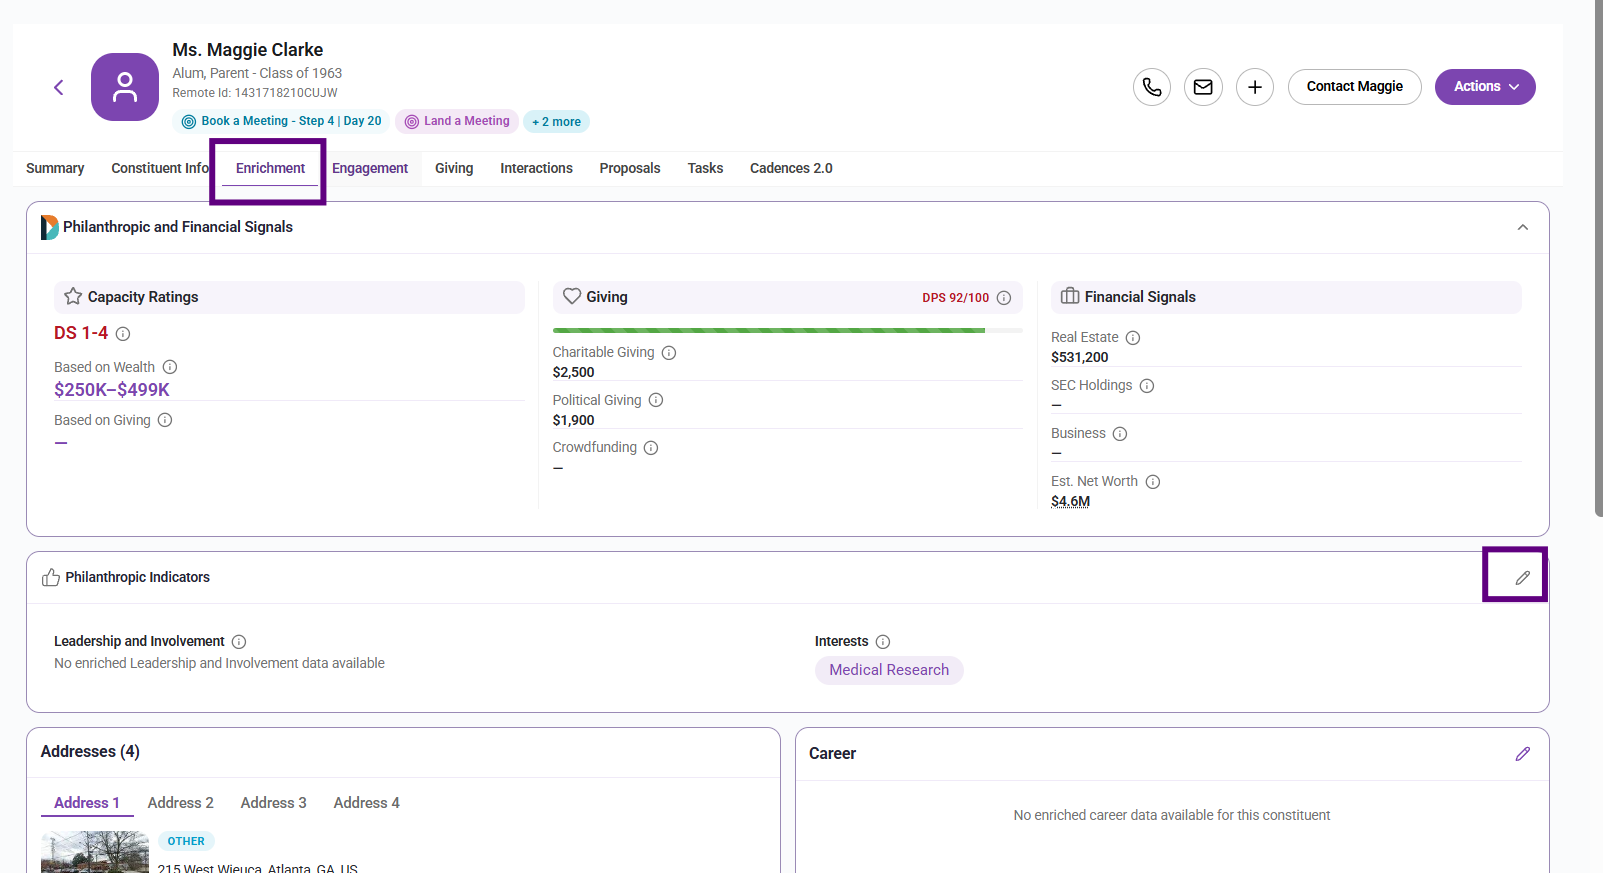
Step 2. Reveal Rejected Data
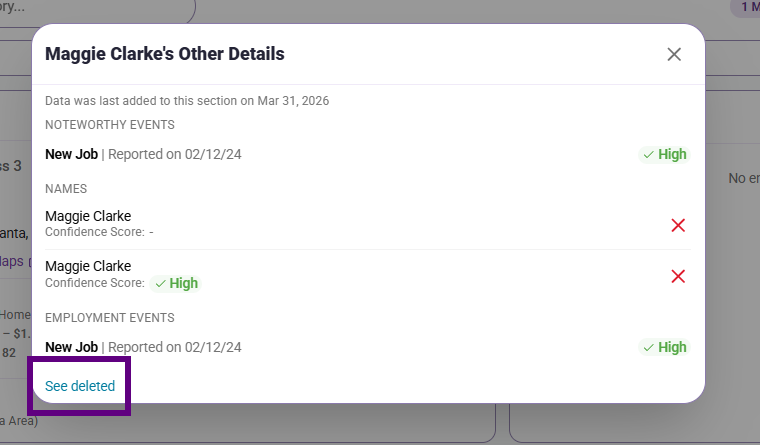
An Edit [Constituent’s Name] Bio pop-up appears. If you or another user previously rejected enriched Summary data, you’ll find a See deleted button at the bottom of this popup. Click See deleted to reveal the constituent’s rejected data.
Step 3. Click Undo Next to Correct Data Entry
Locate the data you wish to reinstate, and click Undo next to the entry to restore it!
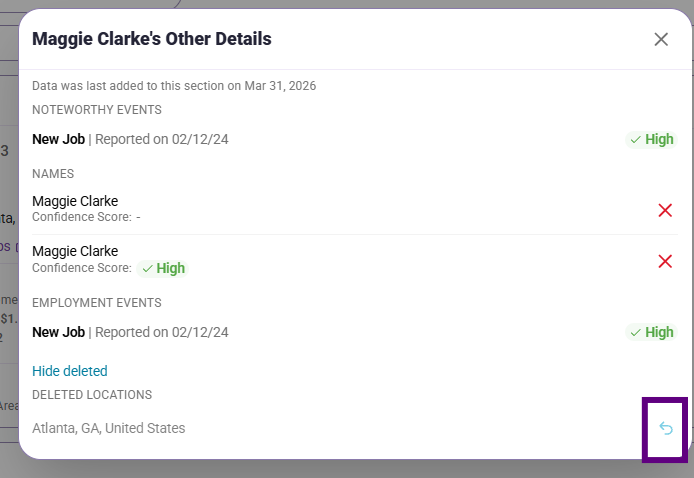
Note: If you reinstate a social media link that was previously used to source the constituent’s profile image, EverTrue also reinstates the associated image, when applicable.
For any other questions, reach out to EverTrue Support at genius@evertrue.com.
Reply
Content aside
- 4 yrs agoLast active
- 820Views
-
1
Following